This tutorial is intended for MonoX administrators. It describes in detail the full process of installing MonoX CMS prerequisites for Windows Server 2008 and IIS 7.0. This tutorial can also be used for Windows 7 scenarios, as the installation process is almost identical.
Before you start installing MonoX CMS we advise you to read the following articles and familiarize yourself with the terms and concepts that we will use in this tutorial:
We will divide this tutorial in the following sections:
- Unzip MonoX package and grant folder permissions
- Create a Web site in IIS
- Create an empty database
- Perform MonoX installation
Unzip MonoX package and grant folder permissions
First thing that we need to do is download the latest version of MonoX CMS that can be found at the URL provided above. Unzip the package to the folder of your choice, most often this will be %SystemDrive%\Inetpub\wwwroot\MonoX or something similar. To grant MonoX a permission to create pages, change configuration settings, upload files and perform similar operations, we need to grant modify/write permissions to the "NETWORK SERVICE" (NTAuthority\Network Service) or "ApplicationPoolIdentity" (IIS APPPOOL\ApplicationPoolName) system accounts on "%SystemDrive%\Inetpub\wwwroot\MonoX" folder.
Note that by default, IIS application pools in IIS 7 run under the AppPoolIdentity accounts. More details on this topic
can be found here, however it may be more straightforward for beginners to still use Network Service identity.
To tighten the security after the installation has been complete, you may remove the write permissions on all folders except the following
"/MonoX/ApplicationData"
"/Upload"
However, in this case you will not be able to dynamically create pages from within MonoX in an arbitrary folder. The solution for this problem is to create a sub folder for your custom project, grant modify permissions on it and create pages there.
Create a Web site in IIS
Although there are many articles on this topic we've decided to include this steps in our tutorial because many of our users have problems with it and we wanted to have the whole procedure in one place. Before we start you need to be sure that system administrator has installed a fully functional instance of IIS on your machine. If IIS isn't installed on your server please follow
these instructions to properly install it.
Note that a
500 - internal server error that appears after you try to access MonoX after the installation has finished, with both MonoX logs and Windows event logs empty, indicates that your IIS is not correctly configured. Use
aspnet_regiis tool to resolve this error.
In many cases our users first want to create a Virtual Application under the Default Web site so they can develop the whole Web Site and then publish it to the production Web server. In this section we will cover two different scenarios - VIrtual Application and Web site - followed with step by step screenshots. Proceed by opening the IIS Manager and then follow the instructions below.
Virtual Application
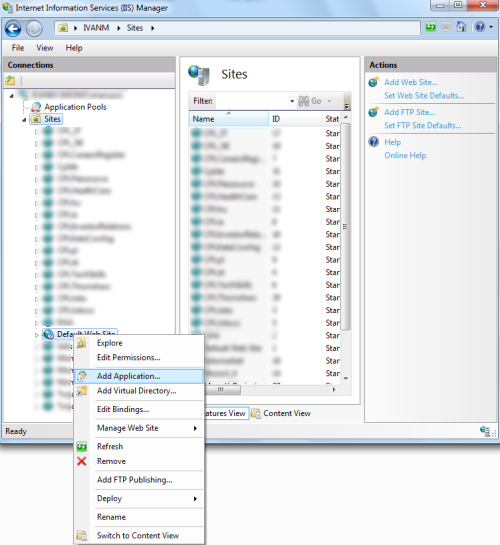
Go to the root node of the default Web site (or other site under which you want to create the application), right click on it and select “
Add Application…” from the list.
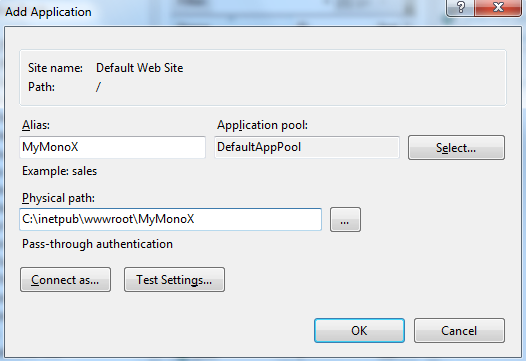
Enter the application alias and select a physical path for your MonoX site. You can also select an existing application pool. Please check if the selected application pool runs under the correct version of .NET - running a version of MonoX compiled for .NET 4.0 in an application pool that runs under .NET 2.0 will result in an error.
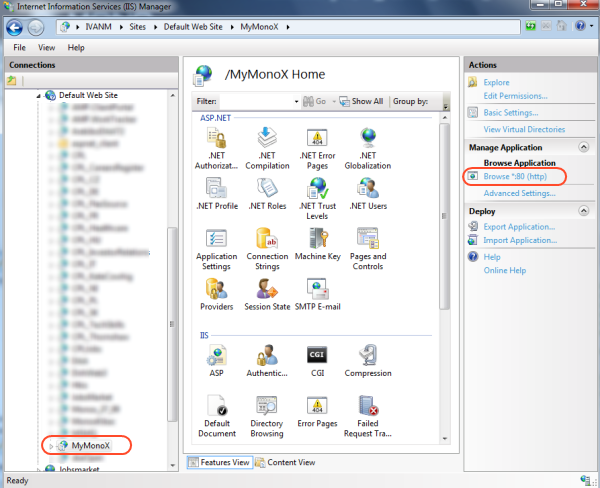
The image below shows the result. Open your web browser and navigate to your new MonoX site or simply click on "
Browse *:80 (http)" as shown in image below.
 Web site
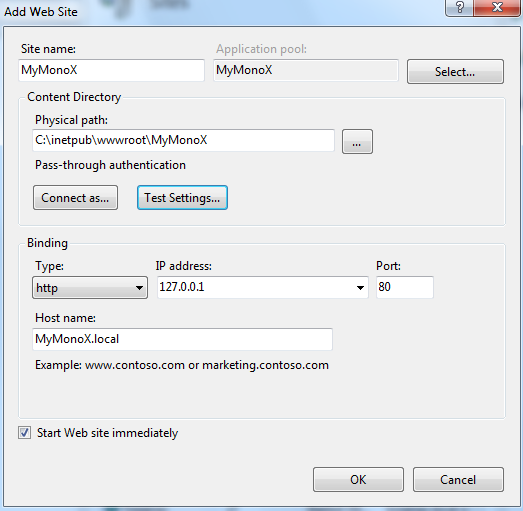
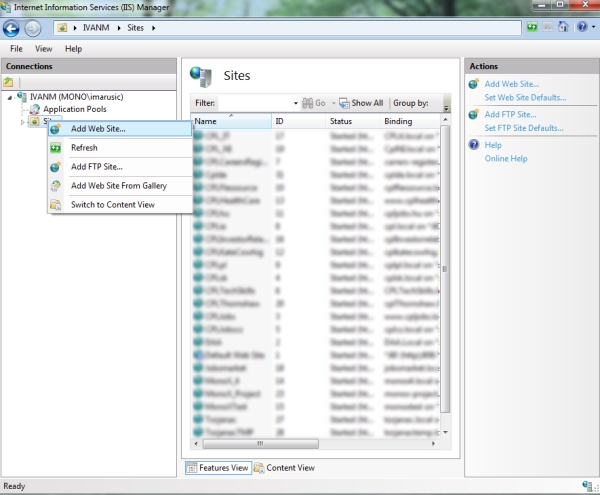
Go to the server root node and right click it, and then select “
Add Web Site…” from the list.
i
Enter the site name, physical path, IP address, port number and a host name of the Web site. In this example we used localhost IP address 127.0.0.1. Click on
OK.
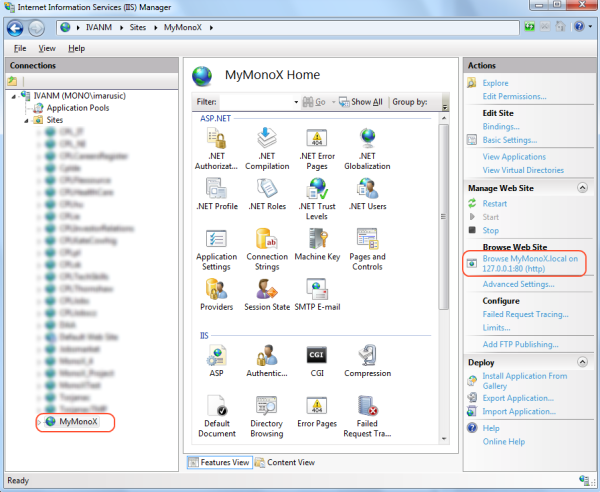
The image below shows the result. Open your web browser and navigate to your new MonoX site or simply click on "
Browse MyMonoX.local on 127.0.0.1:80 (http)" as shown in image below.
 Create an empty database
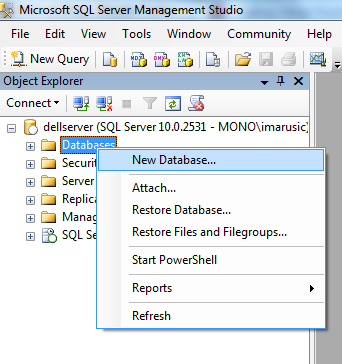
You can create an empty database using the SQL Server Management Studio or similar management tool. Open the SQL Server Management Studio, right click on
Databases and select
New Database.
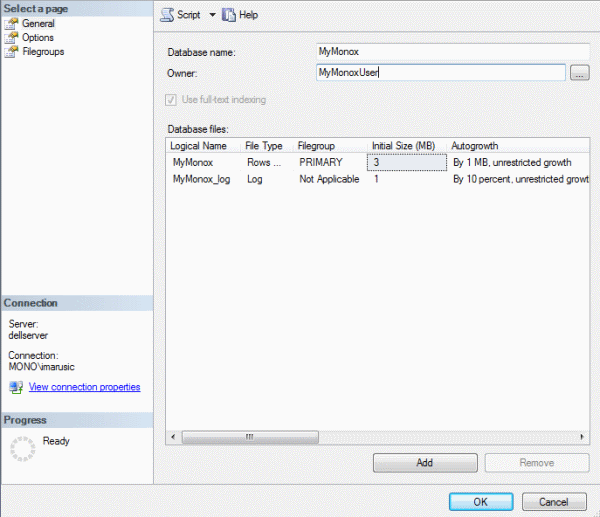
Type the database name and its owner and click on the
OK button.
Use the
Security/Logins section of the Object explorer pane in the Management Studio to create a new login (or use the existing one) for the account that will be used by MonoX engine to access the database. Both Windows authentication and SQL Server authentication can be used, as long as you grant read, write and all ASP.NET-related privileges to this account using the User mapping section of the Login properties screen.
Start MonoX installation wizard
You are now ready to start the installation wizard. Please click here to get detailed information on the installation process.