Introduction
In this post I'll address some issues I came across while trying to prepare the environment for Redmine 2.1.4 with Ruby 1.9.3 and RubyOnRails 3.2.9. I am using Windows 7 64 bit with Oracle VM VirtualBox 4.2.4 to host a machine with Ubuntu 12.04 LTS 64 bit.
Installing Ubuntu in VirtualBox
Creating a new VirtualBox virtual machine with fresh installation of Ubuntu is a straightforward process. Create a new VirtualBox machine and choose appropriate hardware settings for it. Make sure that an ISO image with Ubuntu installation is present in the CD drive. All you need to do after that is to follow installation instructions.
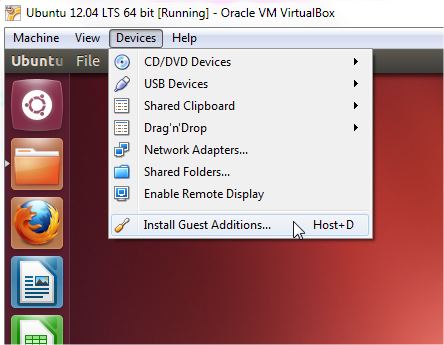
After restarting the machine for the first time and logging in we need to install the VirtualBox guest additions to get access to all available features of the guest machine (mouse integration, full resolution, etc.). Just press Host+D or choose Install Guest Additions... action from Devices menu.
A restart is needed after finishing this process.
Next, we need to install and activate drivers for guest addition module support for dkms. We will do this by clicking on the drivers icon in the toolbar.

After installing the drivers we need to update the software packages that were installed by default and check if there are any upgrades. We will do this using Advanced Packaging Tool included in every Ubuntu distribution. This must be done with superuser (root) privileges so we use a popular sudo command.
sudo apt-get update
sudo apt-get upgrade
Installing Ruby and RubyOnRails
Now we can continue with the installation of Ruby and RubyOnRails. I used this
tutorial. It contains instructions for installing Ruby using
RVM. Just follow steps specified there and everything should go without problems - in essence, it boils down to using the following commands:
1.sudo apt-get install curl
2.curl -L get.rvm.io | bash -s stable
3.source /.rvm/scripts/rvm
4.sudo apt-get install build-essential openssl libreadline6 libreadline6-dev curl git-core zlib1g zlib1g-dev libssl-dev libyaml-dev libsqlite3-dev sqlite3 libxml2-dev libxslt-dev autoconf libc6-dev ncurses-dev automake libtool bison subversion
5.rvm install 1.9.3
6.rvm use 1.9.3 --default
7.rvm rubygems current
8.gem install rails
The only thing I did differently is the installation of
NodeJS after installing Ruby dependencies (after command 4.). In the comments for the tutorial you can find that NodeJS provides
execJS which is a requirement for the default installation of Rails. I installed NodeJS using this command:
sudo apt-get install nodejs
After this we have Ruby 1.9.3p327, Rails 3.2.9 and Gems 1.8.4 installed in virtual machine.
Installing Redmine
Now we need to get Redmine source. Downloading and building Redmine from source is a preferred way to install it since we will benefit from the latest fixes and upgrades provided by the community.
Subversion is included in Ubuntu and I'll use it to get latest source. You can find instructions for code checkout on the Redmine site Download section - just enter the command below and the last stable release will be checked out to subdolfer redmine-2.1:
After downloading the code we need to modify a few configuration files in Redmine project to support our development environment. We will start with
Gemfile, as it contains configuration settings for all required gems. I ended up with changing these lines to accommodate our environment:
gem 'rails', '3.2.9'
gem "i18n", "~> 0.6.1"
and in development group
Now run
bundle install to install all missing gems.
Here is where my problems started. You can try to fix them yourself by examining
mkmf.log and
gem_make.out files - here is what I did:
The first error was
"An error occurred while installing mysql2 (0.3.11), and Bundler cannot continue.
Make sure that `gem install mysql2 -v '0.3.11'` succeeds before bundling."
It's obvious that we get the error when installing mysql2 gem. I found the solution at
StackOverflow - I had to install the mysql prerequisites using this command:
sudo apt-get install libmysql-ruby libmysqlclient-dev
After I ran
bundle install again, I got another error which is related to
PostgreSQL.
"An error occurred while installing pg (0.14.1), and Bundler cannot continue.
Make sure that `gem install pg -v '0.14.1'` succeeds before bundling."
If you try to install PG you'll find out that the problem was caused by
rmagic gem. I fixed this by installing all required dependencies using these commands:
sudo apt-get -y install graphicsmagick-libmagick-dev-compat
sudo apt-get install libmagickcore-dev libmagickwand-dev
gem install rmagick
sudo apt-get install -f libpq-dev
Now
bundle install will finish without errors and we need to install
activerecord mysql adapter using:
gem install activerecord-mysql-adapter
Redmine Configuration
You can find instructions for configuring Redmine at
http://www.redmine.org/projects/redmine/wiki/RedmineInstall, but here are the basic steps to make everything work.
We need to configure a database that will store the Redmine application data. I used sqlite and configured it by copying sample database configuration and modifying it. Database configuration files are located in
redmine-2.1/config folder. The working database configuration file is named
database.yml and its content is displayed below:
# Default setup is given for MySQL with ruby1.8. If you're running Redmine
# with MySQL and ruby1.9, replace the adapter name with `mysql2`.
# Examples for PostgreSQL and SQLite3 can be found at the end.
production:
adapter: sqlite3
database: db/production.sqlite3
development:
adapter: sqlite3
database: db/development.sqlite3
# Warning: The database defined as "test" will be erased and
# re-generated from your development database when you run "rake".
# Do not set this db to the same as development or production.
test:
adapter: mysql
database: redmine_test
host: localhost
username: root
password:
encoding: utf8
test_pgsql:
adapter: postgresql
database: redmine_test
host: localhost
username: postgres
password: "postgres"
test_sqlite3:
adapter: sqlite3
database: db/test.sqlite3
After setting the database configuration, we will need to generate a database instance. I used this command to generate the development database.
rake db:migrate RAILS_ENV=development
Of course, that same command with different RAILS_ENV parameter is used to generate the production and test databases.
Now we need to generate the
secret token which will be used by Redmine:
rake generate_secret_token
THe result of this operation is a file generated in
redmine-2.1/config/initializers folder named
secret_token.rb
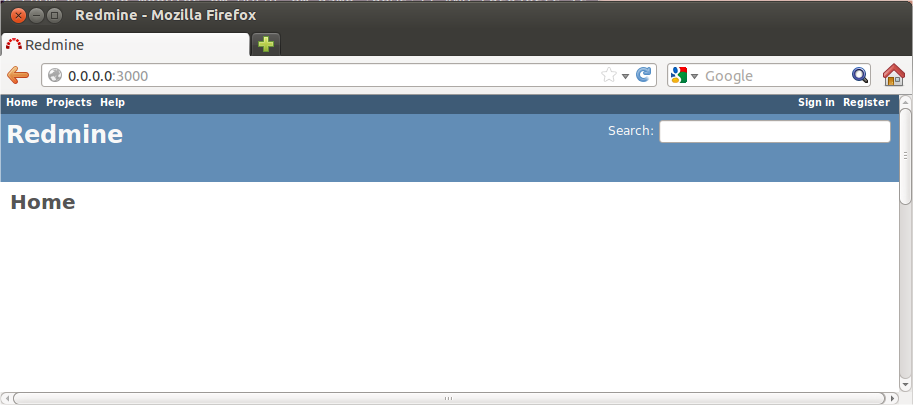
Now we are ready to see how it works - after
rails server command is issued, we can test it by entering
0.0.0.0:3000 in the web browser.
If everything is OK you should see something like this:
 RailsComposer
If we want to start a rails application from scratch we can use the command rails generate to generate starter code for our application or we can use a template called RailsComposer.
Using this template we can generate a new rails app from scratch in just a few steps. We can specify different web servers, databases, template engines, modules for authorization, authentication, create a working GitHub repository, etc.
If you configured your development environment using the steps described above, railscomposer should work without problems and you can test it by running the following command:
This will generate a new app in the
myapp subfolder and you can start it using
rails server.